Get ready to slay any occasion with a chic and easy-to-achieve hair bun style that’ll have you feeling like a K-drama star in no time!

Looking for a hairstyle that’s both chic and easy to achieve? Look no further than the Korean hair bun.
This classic updo is perfect for any occasion, from a day at the office to a night out with friends.
And the best part? It’s surprisingly simple to create.
Whether you have long, short, straight, or curly hair, you can easily recreate this elegant look with just a few simple tools and techniques.
So grab your hair tie and bobby pins, and let’s get started!
In this post, we’ll walk you through a step-by-step tutorial for a popular hair bun style.
What Are Buns?
If you’re wondering what Korean buns are all about, I’ve got you covered.
These hairstyles are all about achieving a subtle, feminine, and natural-looking bun that looks effortlessly chic.
The key is to go for loose, messy, and low-bun styles, which are perfect for any occasion, whether you’re dressing up or down.
One of the things I love about Korean buns is that they’re so customizable.
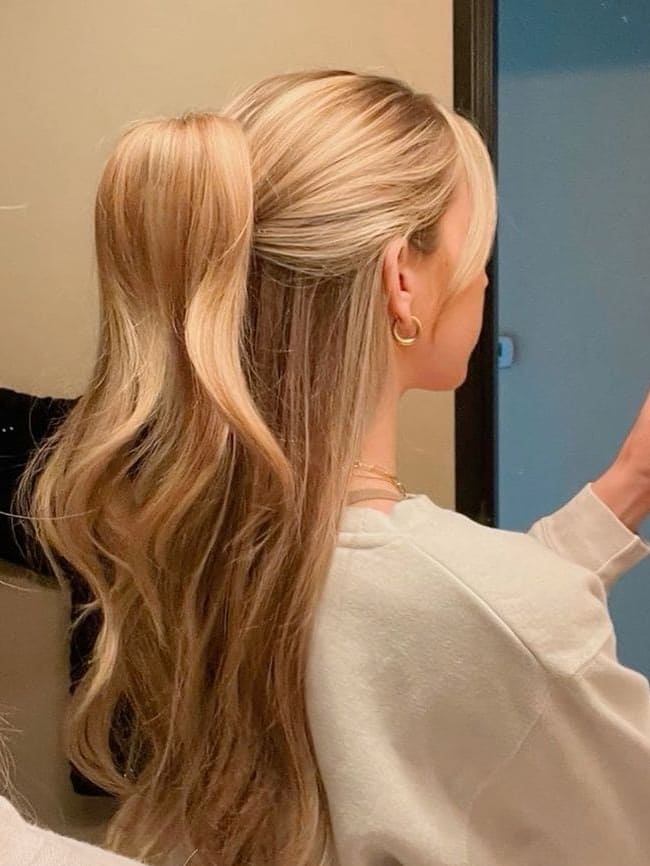
You can tweak them to fit your personal style and hair type, whether you prefer a sleek and tidy bun or a more casual half-up, half-down look. With these hairstyles, the possibilities are endless!
What Do You Need to Prepare for Hair Buns?
Before you start creating your bun, you’ll need to prepare a few things.
First, you’ll need a hair tie or hair band to secure your hair. You’ll also need bobby pins or hairpins to hold the bun in place.
Finally, you might want to use some hair styling products like hairspray or gel to keep your hair in place.
- Elastics: Large Elastics Rubber Bands
- Bobby Pins: U Shaped Hair Pins
How to Do a Hair Bun Style
Now that you’ve got all the necessary tools and products, it’s time to dive into the 5 easy steps that will help you achieve that chic Korean hair bun in no time!
Step 1: Prepare Your Hair
Before you dive into creating the perfect Korean hair bun, make sure your locks are tangle-free and ready for styling.
Take a quick moment to run a comb or brush through your hair and spritz on some hair spray or essence to keep everything in place and ready for the bun of your dreams.
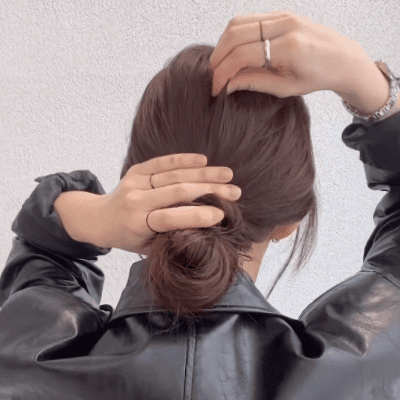
Step 2: Create a Bun

Let’s get your bun show on the road!
Gather your hair into a low ponytail at the nape of your neck, then fold it in half to create a small bun.
Don’t worry about making it perfect just yet; we’ll be refining it in the next step.

Step 3: Wrap the Bun


Now it’s time to give your bun a stylish finish!
Divide the ends of your small bun into two sections and twist them together. Wrap the twisted sections around your bun to create a natural shape that’s sure to turn heads.
Step 4: Secure the Bun


Now that you have created the perfect bun, it’s time to make sure it stays put.
Use a few elastics and bobby pins to secure the bun in place so it doesn’t unravel throughout the day.
Don’t be afraid to use extra pins to keep your bun looking sleek and tidy.
Step 5: Frame Your Face

Now, it’s time to add the finishing touches to your bun.
Pull out a few strands of hair near your temples to frame your face, giving a soft and feminine touch to your overall look.
Don’t forget to give your crown some volume by teasing the hair at the top of your head, creating a fuller and more flattering hairstyle.
With these final touches, your Korean hair bun is complete and ready to rock!

Hair Bun Video Tutorial
If you prefer to watch a video tutorial, check out our Korean hair bun video tutorial below. It’s a great way to see the steps in action and learn some extra tips and tricks.
Wrap Up
And that’s it! You now know how to create the perfect Korean hair bun in just five easy steps.
Whether you’re going to a fancy dinner or running errands around town, this chic hairstyle is sure to turn heads.
So go ahead, give it a try, and enjoy your new stylish look!
Want more hairstyle tutorials?